If you’ve never cooked ribs before, you might be wondering whether cooking ribs up or down will yield better results.
In this article, I will cover cooking ribs bone up or down, and which method will yield better results.
Let’s get into it.
The Different Types Of Ribs
Not all ribs are the same, so before I get into how to cook your ribs, let’s take a closer look at the different types of ribs.
Spare Ribs
Spare ribs are taken from the lower side of the pig, specifically the breastbone and belly.
Similar to the taste of pork belly, spare ribs are rich in taste and fatty in texture.
As bacon is literally cut from pork belly, it isn’t hard to imagine that spare ribs taste similar.
St. Louis Ribs
St. Louis ribs start off as the exact same cut as spare ribs, however, they are then trimmed to remove any excess cartilage and breastbone.
Trimming the ribs down in this way provides them with a uniform rectangular shape to allow them to cook more evenly.
Baby Back Ribs
Baby back ribs, hence the name, are smaller in size when compared to spare ribs.
Baby back ribs are hugely popular as they yield much more edible meat when compared to spare ribs, which tend to be fattier.
They have a curved shape and are cut from the loin area which provides much leaner meat than what you’d expect from spare ribs.
That being said, baby back ribs cook at a quicker rate than spare ribs, so this is something to bear in mind when it comes to grilling. Knowing the cook time is essential to ensure that you don’t overcook your ribs.
Ribs Bone Up Or Down – Which Will Yield Better Results?
When it comes to cooking ribs, you might not know whether to cook them bone side up or bone side down.
So, what do the experienced barbecues say? For most barbecue enthusiasts, cooking ribs bone side down is the most common choice.
For those of you who don’t know, when we talk about “cooking ribs bone up” or “bone side up”, we mean that you should place your rib rack on your grill so that the bones face upward.
There are a variety of reasons why many people choose to cook ribs bone side down.
For instance, the fact that rib meat is tough and fatty means that the rack of ribs is best cooked when positioned with the bone side facing down.
That way, the ribs will cook over indirect heat, meaning that there’s less risk of your meat drying out as the low and slow method will tenderize the meat without sacrificing the moisture of the meat.
Another important reason why people tend to opt for smoking ribs with the bone side facing down is that if you place the ribs bone side up, this will increase the risk of the juices pooling in the middle of the rack.
As a result, the juices will prevent the smoke from permeating the meat, and you will want to avoid this if you can.
Last, but by no means least, This is because it allows the smoke to permeate the bone as well as the meat. As a result, you’ll have beautifully smoky ribs throughout when you bite into the gorgeously tender meat.
However, there are some who prefer to cook their ribs bone side up. Which method you choose is up to you and will require
How To Cook Ribs Bone Down
Step One – Make The Sauce
To begin, you will first need to make a mop sauce. The prep time for this isn’t long, as you just need to melt butter in a saucepan over a medium heat.
Stir in soy sauce, bourbon, and cider vinegar, and keep warm until you are ready to use it later on.
Step Two – Make The Rib Rub
Next, it’s time to make the rib rub.
You will need to combine brown sugar, paprika, salt, black pepper, mustard, celery seed, and garlic powder in a bowl.
Make sure that you mix it thoroughly and that there are no lumps of brown sugar left over.
Step Three – Prepare Your Ribs
Next, it’s time to prepare your ribs for the cooking process. Place your ribs on a chopping board.
Remove the membrane that is located at the back of the rack of ribs. You will need to do this by inserting a knife under it, with the easiest place to begin being located in the center of the rack.
To gain a better grip, try using pliers to allow you to secure your grip, and peel off the membrane. You will need to repeat on the other side if you begin in the center of the rack of ribs.
Step Four – Rub Your Ribs
Once you’ve removed the membrane from the ribs, it’s time to apply the rib rub!
Make sure that you cover both sides of the ribs, and that you are rubbing it all over the meat.
Once you’ve got a nice, even coat of rub on your ribs, allow them a rest period in the refrigerator while you set up the grill.
Step Five – Set Up The Grill
Next, you will need to set up the grill. As a general cooking temperature to aim for, you will want to preheat the grill to 325 °F to 350 °F.
Step Six – Oil The Grill And Begin The Cooking Process
Next, you will need to brush and oil the grill in preparation for your ribs.
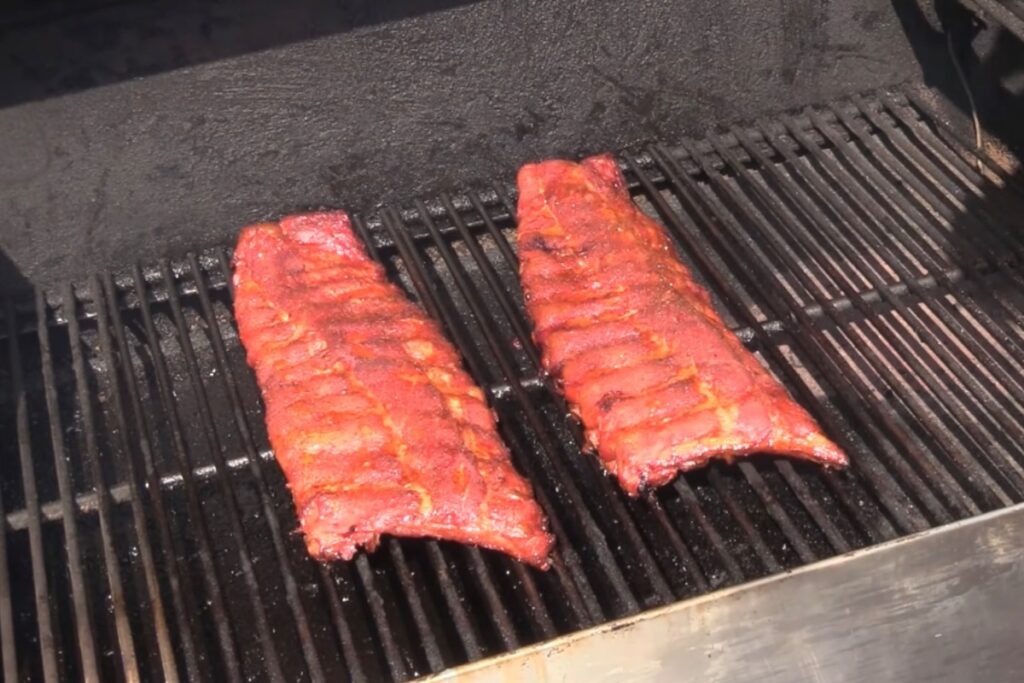
Step Seven – Place The Ribs On The Grill
Next, it’s time to place the ribs on the grill bone down. Cover the grill and allow the ribs a cooking time of around 45 minutes.
Step Seven – Mop The Ribs On Both Sides With The Pre-Prepared Sauce
After the 45 minutes of cooking time has passed, you will want to mop the ribs with sauce on both sides.
Re-cover the grill and continue cooking the ribs until they are well browned. The ribs will need to be cooked through, and tender enough to pull apart with your fingers.
While it’s okay to have a little pink meat, if there is a lot of pink meat and the ribs and you are met with resistance or the meat not easily separating from the bone, then you will need to continue cooking them. The internal temperature for ribs is around 195 °F.
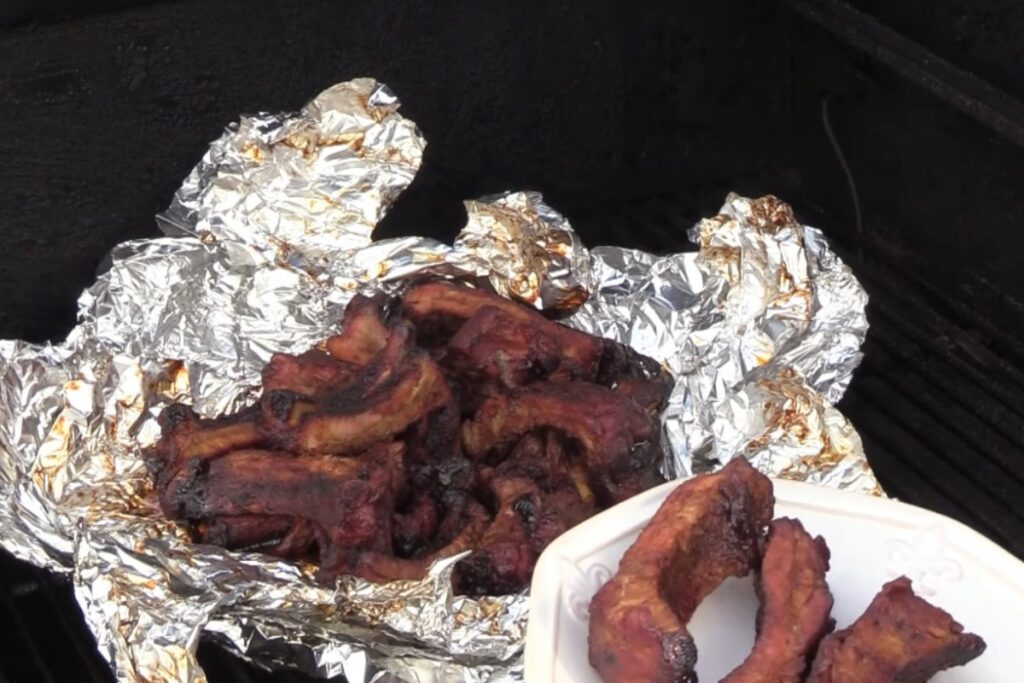
Step Eight – Cover The Ribs In Barbecue Sauce
You will want to now cover your ribs in barbecue sauce and place them over the fire. You will need to grill the ribs over the flames until the barbecue sauce has begun to turn brown and is bubbling, which will typically take from 1 all the way up to 3 minutes on each side.
Step Nine – Serve Up Your Ribs.
Last, but by no means least, it’s time to tuck into your ribs.
Tips For Cooking Ribs
There are a variety of different tips for cooking ribs. These tips include but are not limited to:
Prepare A Rib Rub
You will want to prepare a rib rub and apply it generously to coat the ribs for 2 to 12 hours before you’re ready to cook them. This will allow the ribs to marinate in all of that flavor, and will result in some seriously delicious ribs!
Know When It’s Time To Remove The Ribs From The Heat
You will need to make sure that you remove your ribs from the heat before the meat begins to fall off the bone. This comes down to the fact that if you wait this long, the meat will become dry by the time it is ready to serve it up.
On the other hand, you don’t want to end up with undercooked meat, so knowing what cooked ribs feel and look like is essential.
What About Smoking Ribs Wrapped In Aluminium Foil?
This is a different circumstance, and there’s much debate regarding how you should cook your ribs when they are wrapped in foil.
In my opinion, it doesn’t matter too much whether you decide to cook your ribs bone up or down when they’re wrapped in foil. The foil will keep hold of any juices.
That being said, you should be aware that the steam inside the foil could result in a mushy rib texture if they’re left in there too long.
In Summary
Many people prefer to cook ribs bone side down. This provides your rack of ribs to cook with indirect heat without sacrificing the vital moisture ribs need for a tender result.
So, there you have it. Hopefully, after reading this article you have a better idea of how to cook ribs for the best results.